Saturday, 12 April 2014

Magnolia Rally.
26-27 April 2014.
34th Round.
It's time to test our track in real life.
Everybody with racing license are welcome to join in :)
BaS Design & BaS Textures
as well as 
will be there to promote our work and work of other track creators.

Tuesday, 18 March 2014


BaS Design & Bas Textures
coming back soon with video tutorials.


But before that,
MAGNOLIA


Thursday, 9 January 2014

Welcome back in 2014.
Still "Construction is a Project"
Since few weeks I had to stop few projects to focus more time on MAGNOLIA RALLY.
Beta version is coming soon. 
You can check it out below, as well as sign up for beta version test driver.


I'll be back with more tutorials soon.


Tuesday, 10 December 2013

BAS DESIGN
is 
coming soon!

Be Prepared.


Small Rally Guru Tribute for Conversion of Karowa.


 Lots and Lots of CooL Stuff.


Sunday, 8 December 2013

7.Road sides finish touch


When we have our texture of tarmac ready we can finish it with sparkle of sand on the sides. 


Here you have random texture of sand. You can FREE DOWNLOAD High Quality Image in the link below.


Copy and Paste it into your Tarmac image. Pres CTRL+T to free transform. Grab top corner and by holding SHIFT rotate image by 90 degrees. 


Choose Move Tool(V) and by holding ALT duplicate Layer to cover both sides of the road. You should get few new Layers depending on size of your Texture.


Select all Sand Layers, Right click on it and select Marge Layers. That will create one Layer witch will be easier to edit.


Chose Brush Tool(B) and set hardness to about 30-40 percent or download custom brush below.


Now create Layer Mask on sand image and cover edges of that texture to blend it with asphalt.


Adjust Hue and Saturation till you get color you desire. 


Now you have texture that you can cover your road.


Cool Tip.
You can change your sand into, for example snow simply by changing saturation and brightness.


As always you can FREE DOWNLOAD sample file below.


Friday, 6 December 2013

6. Working With Layer Mask

Another powerful tool in Photoshop is Layer Mask. It is very important to learn how to work with Layer Masks.
This amazing tool will get your work on another level of creating textures and other images.
Lets start with simple example. 
Create new image 512x512 pixels and fill it with black color. Then create another Layer underneath and fill it with red color. 


Next, switch to Black layer and create Layer Mask.


When you are working with Mask it is very important to remember to switch between Image and Mask.
Mask is working only with Black , White Colors and shades of  gray.
Black Color is Masking (hiding) Image and reveling Layer underneath.
 White Color is reveling (showing) that image back.


Therefore when you paint anything on mask with black it will erase it from image but not deleting it permanently and you will see layer below. You can easy show it back with White color so you can use Layer Mask instead of Eraser  Tool witch is very, very useful. You can clearly see on picture below how Black color is Masking Black Layer and revealing red layer below.


That's why two main colors in Photoshop are Black and White. By pressing (D) you can quickly go back to default color settings and to switch between White and Black press (X).  


Click below to FREE DOWNLOAD sample file.


Sunday, 1 December 2013

5. Introduction to Smart Objects.

Let's take step back and focus for a minute on Smart Objects. This cool feature is very useful tool. It's like separate document in your texture file..
First select your layer or layers that you want to convert. In example below our tarmac texture includes two layers. 


Right click on the layers and choose Convert to Smart Object.


You should get one layer with Smart Object thumbnail.


When you double click on right bottom corner of that thumbnail another window will pop up and after pressing OK new document will open only with those two layers that we have chosen  earlier. This is very cool stuff, because if you change size of Smart Object, lets say from 2048x2048 pixels to 512x512 pixels after opening it it will still have that 2048x2048 resolution. You can even have one Smart Object in  many projects in one folder and after you process it, it will apply changes to all documents.


Texture looks like it's ready for texturing but it's not. It still has some imperfections that  will make texture look like its duplicated.
The fastest way for me to check it is to double Canvas size and by choosing Move Tool(V) and holding ALT duplicate our texture.


Straight away you can see witch spots will create that unwanted effect. You can fix that with Clone Stamp Tool (S) to get results like below. By doing so you will be able to cover large terrain with small texture,


When you're done fixing texture you can go back to your original canvas size. Simply hide all unwanted layers and choose Image-Trim from Photohop Toolbar.


Close that file and save changes. It will automatically update those changes in all your Smart Objects.
Now You have your tarmac ready.


It might sound like it complicated but if you practice for a while you'll see that it's not.
As always you can click below to FREE DOWNLOAD High Quality Sample file and email address for any questions.


Saturday, 30 November 2013

4.Color Adjustments and making selection with Color Range Tool.

If you are not happy with color of tarmac texture, I mean the yellow and red stones in it you can simply change it with very useful Color Range Tool. You can find it in the SELECT  TOOLBAR in Photoshop.


I find this tool very helpful and I really use it a lot. So it is important to play with it and practice as much as you can.
By choosing 'Select  by Color Range...' you will be able to separate-select colors that you want to get rid of.
At this time we will use Add To Sample tool.


Carefully click on yellow an red colors in the picture, but remember that there are many different shades of that colors so take your time. If you choose some other colors by mistake you can remove them with Substract From Sample tool witch is right beside it. 
When you're done click OK and you should see your selection.


When you have your selection ready you can add Hue&Saturation Adjustment Layer. It will only apply to your selection, so it will be created with Layer Mask. If you haven't work with Layer Masks yet, know that  they are one of the main feature in Photoshop and we will use them in almost every step of our work. 
I will dig into 'Masking Layers' in further posts. 


 By now you should be able to decrease saturation of selection to '0' so all unwanted colors will be gone.


You can FREE DOWNLOAD sample file below.


Friday, 29 November 2013

3.Upgrading Tarmac and preparing it for further modifications.

When you have created your plain texture of tarmac we can upgrade it a little bit :)
Add a little bit of "life" to it.

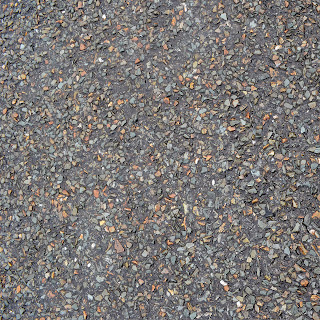
You can click below to DOWNLOAD FREE tarmac texture.


Open it in Photoshop and Copy and Paste to our plain texture of road.


Change size of that image, by pressing CTRL+T and holding SHIFT to match grain size to one that you desire.
Holding the SHIFT key down forces the width-to-height aspect ratio of the selection to remain the same as you drag.
Choose Move Tool (V) and by holding ALT drag to create copy of chosen layer.


Cover all of our plain picture and then select all layers by clicking on them while holding CTRL.
Right click on the layers and choose Convert To Smart Object. That option will allow you, if needed to go back to layer size without loosing its quality. I will describe Smart Objects in more details later on.


Change blending mode to Soft Light to create nice effect.


Add crack in the middle of the road and try to work on details a bit more with Erase Tool(E). Remember to set brush hardness to about 30%.
You can click below to FREE DOWNLOAD my sample file of cracked tarmac.


Adjust Brightness by adding Brightness&Contrast layer. To apply it only to one layer, right click on adjustment layer an choose Create Clipping Mask. Make sure that adjustment layer is above layer that you want to clip it to.


And there you have very nice texture of tarmac.


If you have any questions don't hesitate to ask.