Saturday, 30 November 2013

4.Color Adjustments and making selection with Color Range Tool.

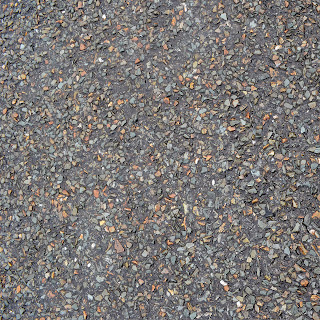
If you are not happy with color of tarmac texture, I mean the yellow and red stones in it you can simply change it with very useful Color Range Tool. You can find it in the SELECT  TOOLBAR in Photoshop.


I find this tool very helpful and I really use it a lot. So it is important to play with it and practice as much as you can.
By choosing 'Select  by Color Range...' you will be able to separate-select colors that you want to get rid of.
At this time we will use Add To Sample tool.


Carefully click on yellow an red colors in the picture, but remember that there are many different shades of that colors so take your time. If you choose some other colors by mistake you can remove them with Substract From Sample tool witch is right beside it. 
When you're done click OK and you should see your selection.


When you have your selection ready you can add Hue&Saturation Adjustment Layer. It will only apply to your selection, so it will be created with Layer Mask. If you haven't work with Layer Masks yet, know that  they are one of the main feature in Photoshop and we will use them in almost every step of our work. 
I will dig into 'Masking Layers' in further posts. 


 By now you should be able to decrease saturation of selection to '0' so all unwanted colors will be gone.


You can FREE DOWNLOAD sample file below.


Friday, 29 November 2013

3.Upgrading Tarmac and preparing it for further modifications.

When you have created your plain texture of tarmac we can upgrade it a little bit :)
Add a little bit of "life" to it.

You can click below to DOWNLOAD FREE tarmac texture.


Open it in Photoshop and Copy and Paste to our plain texture of road.


Change size of that image, by pressing CTRL+T and holding SHIFT to match grain size to one that you desire.
Holding the SHIFT key down forces the width-to-height aspect ratio of the selection to remain the same as you drag.
Choose Move Tool (V) and by holding ALT drag to create copy of chosen layer.


Cover all of our plain picture and then select all layers by clicking on them while holding CTRL.
Right click on the layers and choose Convert To Smart Object. That option will allow you, if needed to go back to layer size without loosing its quality. I will describe Smart Objects in more details later on.


Change blending mode to Soft Light to create nice effect.


Add crack in the middle of the road and try to work on details a bit more with Erase Tool(E). Remember to set brush hardness to about 30%.
You can click below to FREE DOWNLOAD my sample file of cracked tarmac.


Adjust Brightness by adding Brightness&Contrast layer. To apply it only to one layer, right click on adjustment layer an choose Create Clipping Mask. Make sure that adjustment layer is above layer that you want to clip it to.


And there you have very nice texture of tarmac.


If you have any questions don't hesitate to ask.


Monday, 25 November 2013

2.Tarmac texture preparation. Perspective Crop Tool (C).
After you have created your plain texture of asphalt you can start creating white lines, yellow lines, side walks, holes cracks in the road etc. 
But before that we will have to  think of a scale that everything will match to.
I will explain that to you all on example of 'Rally of Magnolia'.
To have everything matching to scale you need to recalculate meters for pixels.
For example in RM (Rally of Magnolia) we have 4x4 meters in 256x256 pixels square. 


Believe me, it is easier to do textures when you have that scale to refer to.
Less meters in that pixel range would mean higher resolution in textures but it is harder to optimize game 
fps (Frames Per Second) .

Let's create our crack that goes trough the middle of the road.
In this example our road will be 6m wide. So create document 384x384 pixels.
The best way to get realistic texture is to copy it from picture. Again it is best to have your own pictures, but as long as you don't get any money from your projects you can use pictures from google earth ;)

So,
there we have picture of cracked asphalt


crop it with Perspective Crop Tool (C)


Move top corners to the place where top of your texture is going to be and the bottom to low end of your texture. This is what you should end up with.


Then copy and paste it on to your plain tarmac texture, and by pressing Ctrl+T thats free transform, click and grab top right corner. By holding Shift you can change size of the texture without messing wit it shape.


Next choose Move Tool (V) and by holding ALT move that image. That way you will duplicate that layer. Repeat this few times until you get crack trough whole of your texture. You should have couple of layers.


 Then select them by holding CTRL an clicking on layers. Right click on one of the layers and chose
Marge Layers to get only one layer of them.


You should end up with only two layers. Your Crack Layer and your Asphalt Layer.
Important tip:
At this time it is good to start naming your layers by double click on it. Believe me, it will shorten your work later on.


This will be much easier to process.
Then erase the sharp edges with Erase Tool (E) with hardness of the brush set up to around 30-35% so it blends in with tarmac.


You can adjust color, brightness or contract to match color of tarmac layer and there you have your street with basic crack in the middle.


I hope that's not to complicated. My description, I mean :)
Practice and have fun.
It is the best way to learn.
If you have any questions send me email I'll be more than happy to help.


Wednesday, 20 November 2013

1.Filter Gallery, Texture, Texturizer.
Lets start with simple texture of tarmac. 
The trick is to create small size texture that will not look like its repeating it self on big surface. 
It is simple to achieve with with Photoshop and its Filter Gallery.    

Let's start:

Create small size file, let's say 480x480 pixels and paint it gray or any color your road is going to be.


Then, get any picture of tarmac. I recommend to do it yourself. It really can be any picture of road outside of your house :) I did mine in Wicklow  mountains near Dublin Ireland.


Next save your tarmac picture as Photoshop file .psd


Now you have base of your texture.
Go to your plain gray texture and open Filter Gallery.


Then go to 
-Texture
-Texturizer
and small icon
-Load Texture


Choose your tarmac.psd file and click Open.
Adjust your scaling, relief and light filters


and there you have your texture that you can clone and copy to any size you want and it will not look like it's made from small square. 
Texture below is double size it was before and with Clone Stamp Tool you can make it any size you need.


FIRST.
I have to recommend to you :

and

Those two blogs are  fully dedicated to car driving simulations, races and creation of  tracks for best games in the world.
BaS Textures is main provider of textures for Rally of Magnolia,
so you can check how the textures are looking and see if you like them or not.
If you do I will be more than happy to show you how I did them, and teach you how to do them yourself.
BaS Design is responsible for logos and picture manipulation that I've mentioned earlier and it would be a separate department in this Blog.  
Welcome everybody to my first post on my first blog.
In this blog sponsored by 'BaS Design' and 'BaS Textures' I will try to show  you how to create textures and how to manipulate pictures to create nice looking textures.
It really does not matter if you have used Photoshop before, or not.
My methods are simple and everyone will find it reasonably easy.